Creating a New Category in the Knowledge Base
Learn how to quickly add a new category to organize your Knowledge Base content effectively.
3 November 2024
Adding categories to your Knowledge Base helps you organize information and provide users with easy access to relevant content. Here's a step-by-step guide on creating a new category through the dashboard.
Step 1: Access the Dashboard
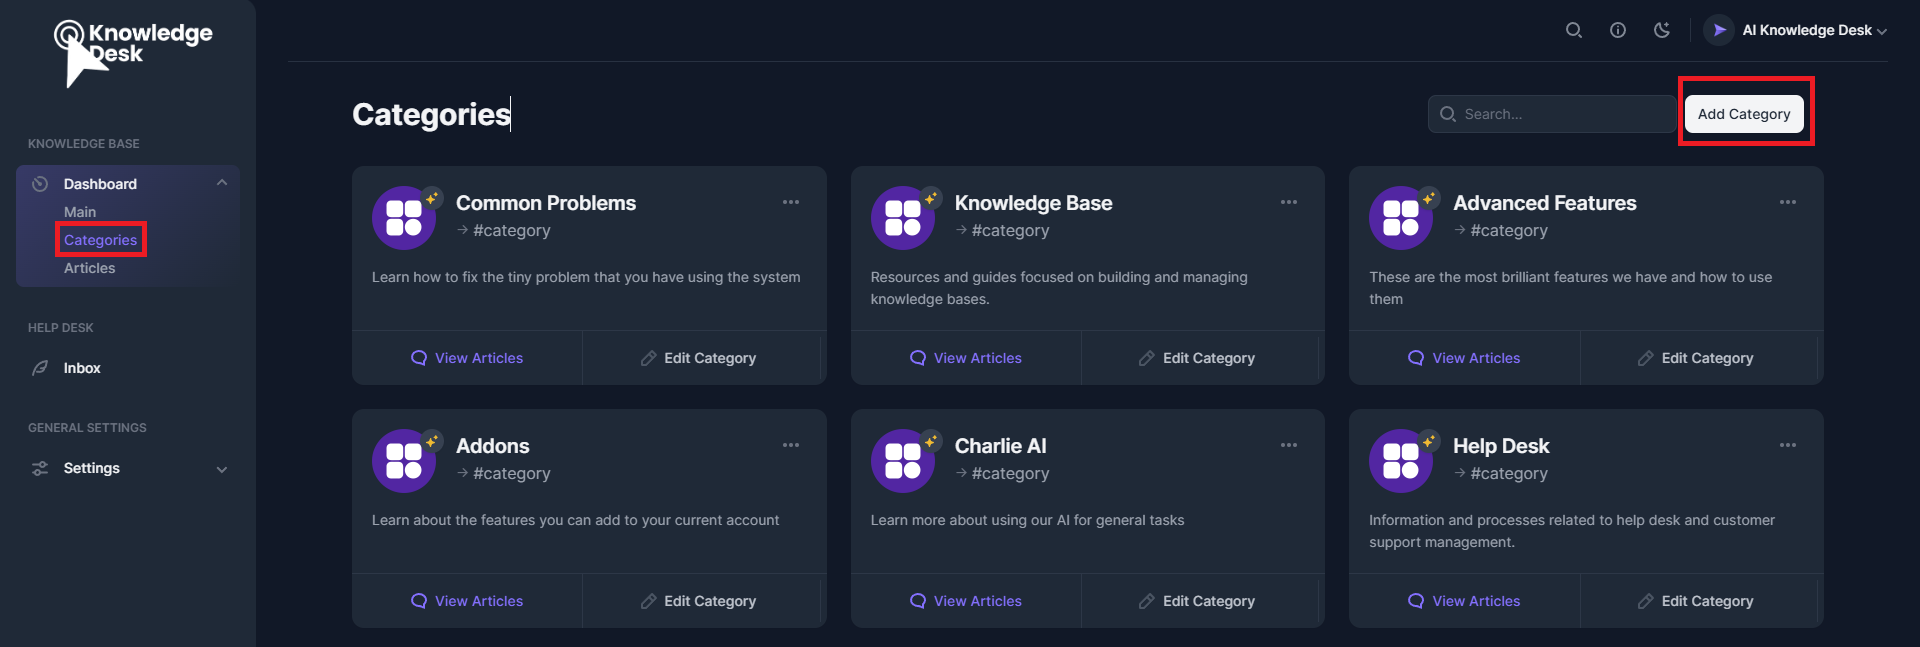
From the sidebar, navigate to the Knowledge Base section. This section will give you options to manage your content.
Step 2: Open the Categories Section
Click on Dashboard, and a list of links will appear in a dropdown menu. From the dropdown, select Categories. This section lets you view and manage all your existing categories.
Step 3: Add a New Category
In the Categories section, look for the "Add Category" button at the top right corner of the screen. Click this button to open a dialog where you can enter the details for your new category.
Step 4: Fill in Category Details
In the dialog box, you’ll need to provide the following information:
Name: Enter a name for the category that is descriptive and relevant to the content.
Description: Provide a brief description to help users understand what content the category covers.
Link: Input a link if applicable, or leave it blank if not needed.
Step 5: Save the Category
Once you've entered all the details, click the Add button to save the new category. Your category will now be added to the Knowledge Base, ready to organize and display relevant content.
By following these steps, you’ll ensure that your Knowledge Base remains structured and user-friendly, making it easier for users to find the information they need.